Step 1. Go to the top menu bar in your Mac system and click on Mail and then click on Accounts.
.png)
Step 2. Add your email account by clicking on Add other Account.
.png)
Step 3. Choose Account type to add an email in Mac and then click on Create.

Step 4. Now Fill the required information and click on Create.
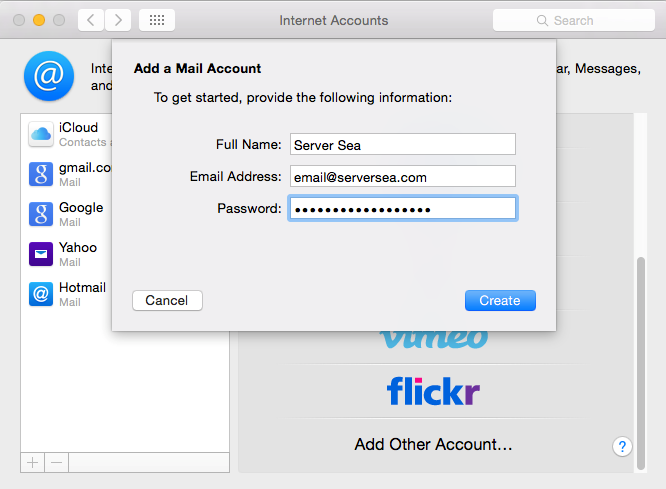
Full Name: Server Sea
Email: email@yourdomain.com
Password: Use the email account's password.
Step 5. Now Fill the required information and make sure to select Account type IMAP then click on next.
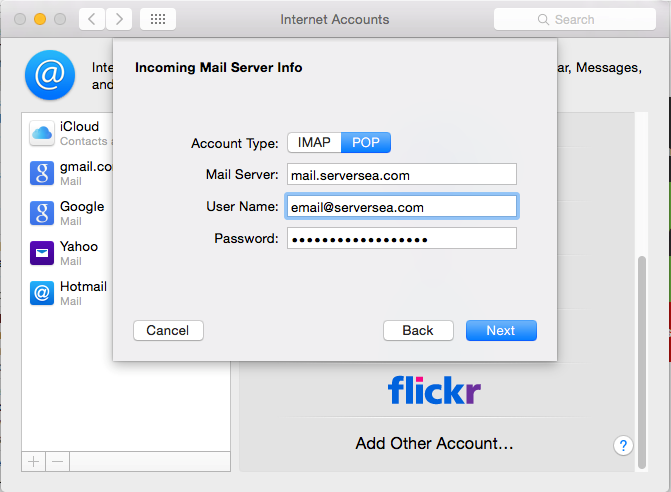
Mail Server: mail.serversea.net
User Name: email@yourdomain.com
Password: Use the email account's password.
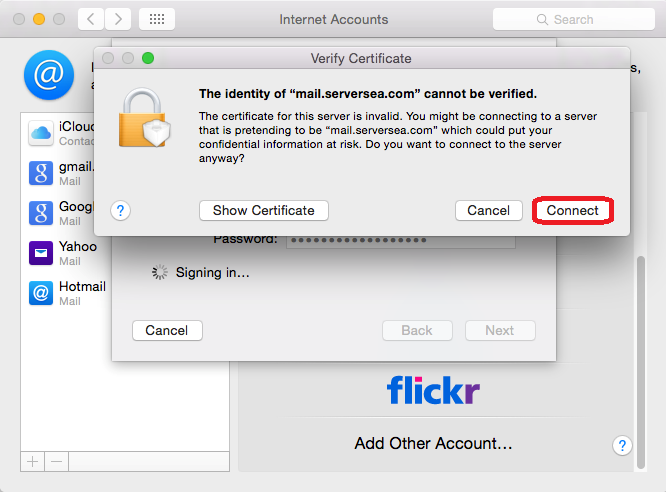
Step 6. Verify the certificate and click on connect.
Step 7. Fill the required information Of Outgoing Server and click on create.
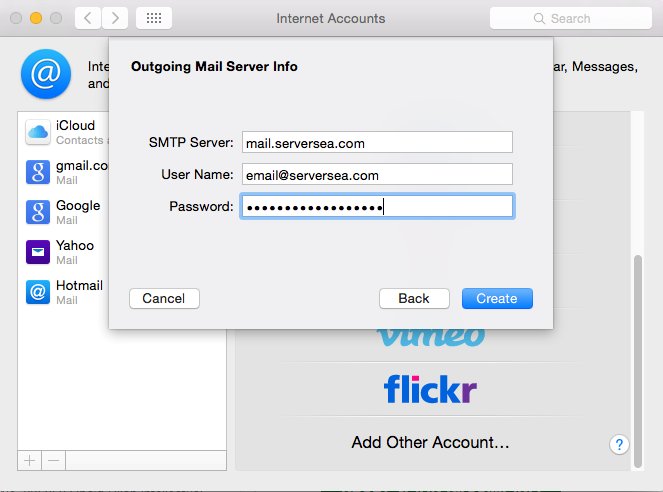
Outgoing Mail Server:
SMTP Hostname: mail.yourdomain.com
User Name: email@yourdomain.com
Password: Use the email account's password.
Step 8. Add Outgoing Mail Server info as mentioned in Screenshot and click on create.
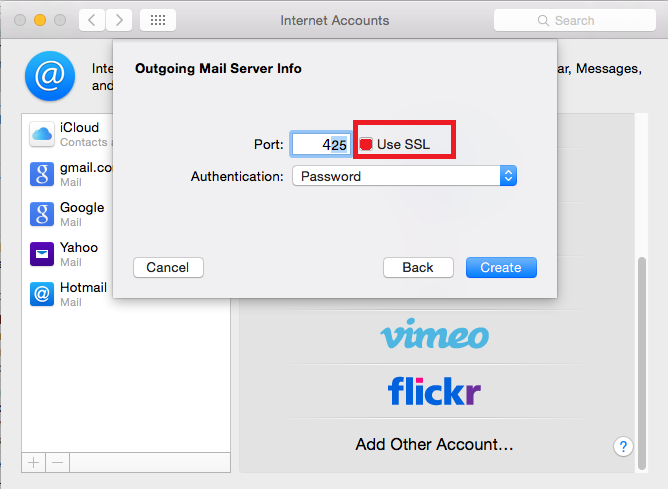
Outgoing Port: 465
Authentication: Password
Use SSL : Check it option.
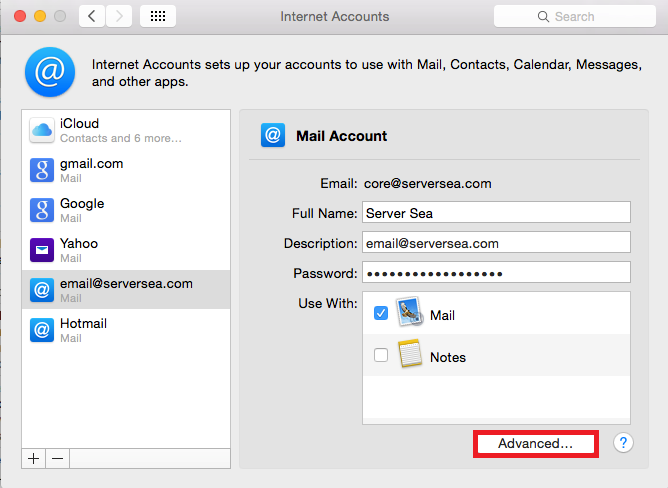
Step 9. Click on your email account which is there in left side bar and then click on Advanced option on bottom right.
Step 10. Fill the required information Of Incoming Server and click on create.
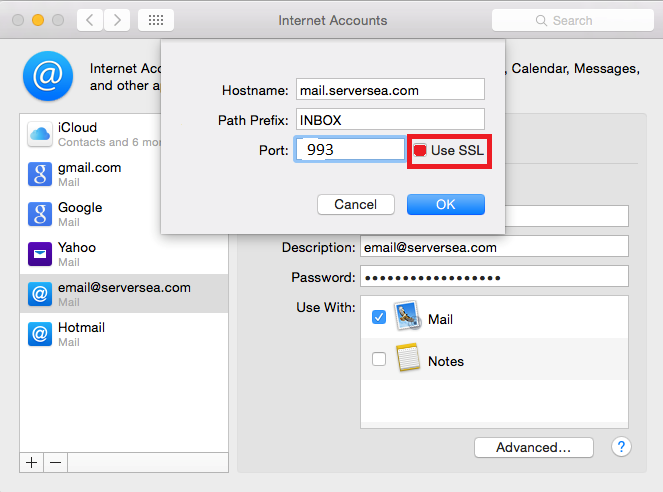
Incoming Mail Server:
POP Hostname: mail.yourdomain.com
Incoming Port: 993
Use SSL : Check it option.
